If you never used static analyzers in your project, it’s about time. The idea is not new, although, it’s a huge asset to the development business.
SonarQube is a set of static analyzers that can be used to identify areas of improvement in your code (eliminate code smells, excessive complexity, code inconsistencies, security vulnerabilities etc.). It also allows you to analyze the technical debt in your project and keep track of it in the future. With Azure DevOps build tasks, you can run SonarQube analysis with the minimal setup for a new or existing CI pipeline.
The first thing to do is to declare your SonarQube server as a service endpoint in your Azure DevOps project settings. Read the detailed instructions on how to create a SonarQube endpoint. If you have no SonarQube tasks in your pipeline, you can install it from the Marketplace.
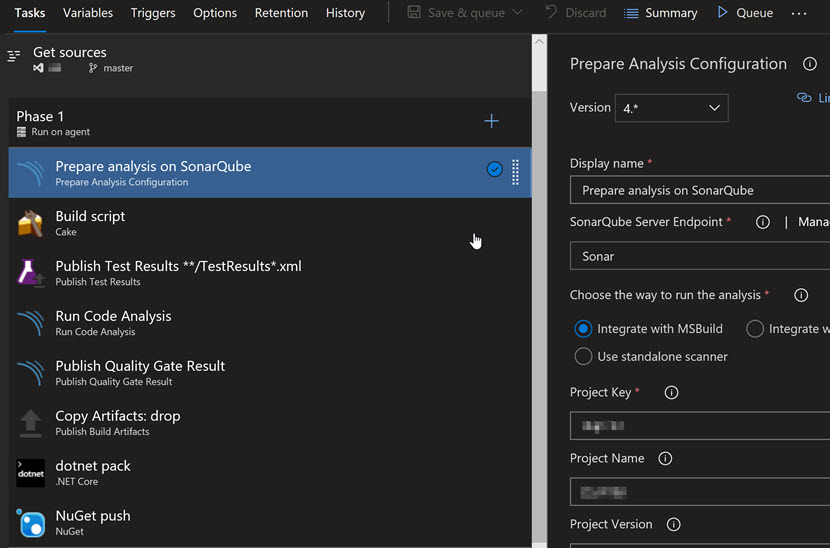
To start analyzing the project, the extension you just installed from the Marketplace provides three tasks that must be executed in order:
- Prepare Analysis Configuration task, to configure all the required settings before executing the build. This task is mandatory. In the case of .NET solutions or Java projects, it helps to integrate seamlessly with MSBuild, Maven and Gradle tasks
- Run Code Analysis task, to actually execute the analysis of the source code.
This task is not required for Maven or Gradle projects, because the scanner will be run as part of the Maven/Gradle build
- Publish Quality Gate Resulttask, to display the Quality Gate status in the build summary and give you a sense of whether the application is ready for production "quality-wise". This task is optional. It can increase significantly the overall build time because it will poll the SonarQube server until the analysis is completed. Well, if you want to see the analysis results on your SQ dashboard, you have to have it in the build pipeline too.
Once composed, your pipeline should look not much different from mine, where I build a .NET Core projects with Cake, run tests, publish test results, run and publish SQ analysis results, and finally package the solution and submit packaged libraries to a NuGet feed:

Deploying SQ is not a big deal, especially if you already use some virtual machine as your build/integration server. However, there is a possibility to use a cloud version of it. If you are analyzing your project on SonarCloud, you should install the respective extension from the Marketplace.
Troubleshooting
If you’re using a Microsoft stack of technologies as I do, it worth to know that starting version 7.0 of SQ, the connection string for SQL Server has changed a bit. For SQL Authentication, it would look like the following:
sonar.jdbc.url=jdbc:sqlserver://localhost;databaseName=sonar
sonar.jdbc.username=sonarqube
sonar.jdbc.password=mypassword
Surprisingly, it may not work like that. For such case, add ‘integratedSecurity=false’, so the first part of your connection details looks like the following:
sonar.jdbc.url=jdbc:sqlserver://localhost;databaseName=sonar; integratedSecurity=false
Another issue you may face: build pipeline has started failing on the ‘build’ step due to outdated SQ version (External issues are not supported on this version of SonarQube. SQv7.4+ is required):

One of the reasons is that MS updates SQ runners (extensions) you use via the Marketplace, and they don’t fit the SQ version anymore. For this case, the SonarQube server should be updated. It worth to keep in mind that if the version of SQ is quite dated (as it was in my case), you would need to install LTS (Long term support) versions in between. In other words, imagine my current version is 6.1, and I want to update to 7.6 (latest one). The problem is that in between these releases were so-called LTS version od SQ 6.7, so, in this case, the upgrade path would look like the following: 6.1 -> 6.7 -> 7.6
The most recent and previous version of SonarQube can be downloaded from the official website.
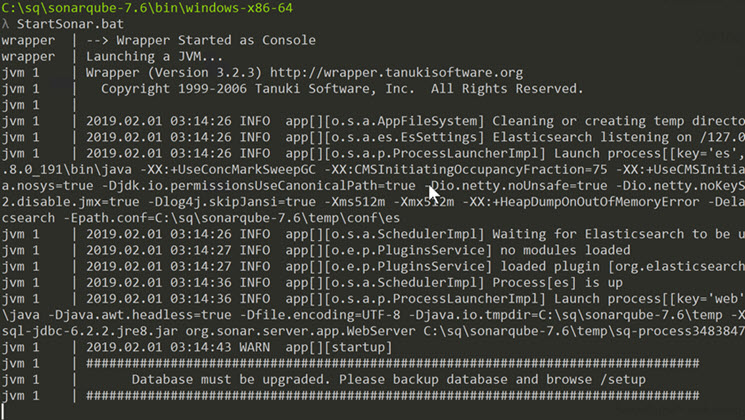
Once the old service is deleted and the new one installed, you can try a ‘dry run’ to see if SQ works properly. Running ‘StartSonar.bat’ will result into the following command line message (Database must be upgraded. Please backup database and browse /setup):

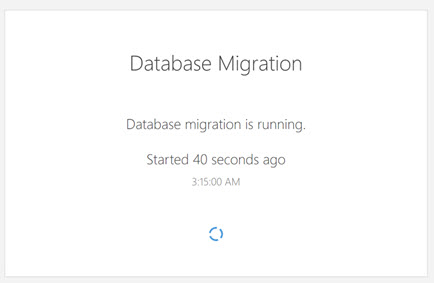
Assuming you’re updating SQ on the VM managed by you, running http://127.0.0.1:9000/setup will result in database update that may take a while (3-15min):

It is highly recommended to backup/clone database before starting the upgrade.
That’s it, guys. Please make comments below if you’d like to see a topic devoted to SQ installation to the dedicated server & integration configuration.